Grin G1 Mini Setup Introductions
Server connection
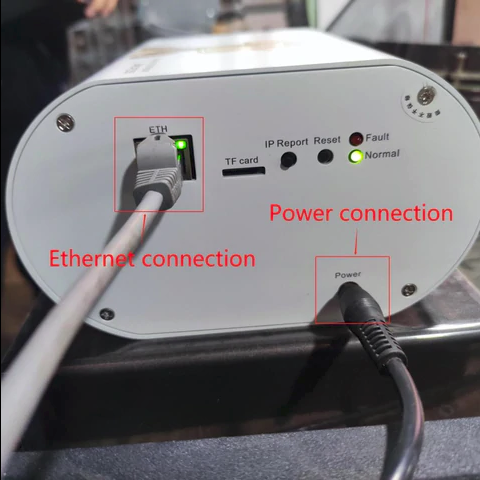
- Please connect with the Ethernet and power supply as the following shows.
Caution: The server and PC must be in the same network segment, otherwise the IP information returned by the server cannot be received.
Find the server IP address.
Download the file Showip.exe.
Right click the “Show IP.exe” and run it as Administrator.
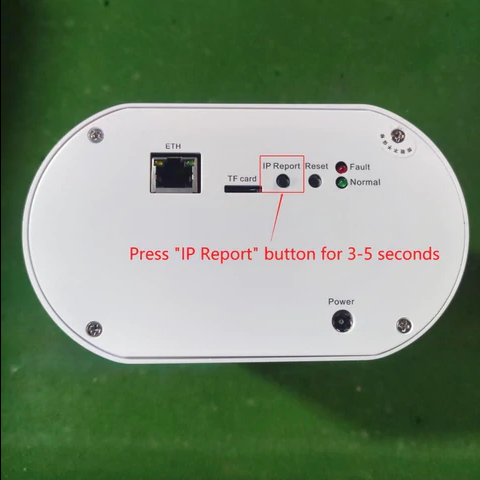
Press the “IP Report” button on the server for 3-5 seconds and release it.
The server IP address will be shown as can be seen below:

User Login
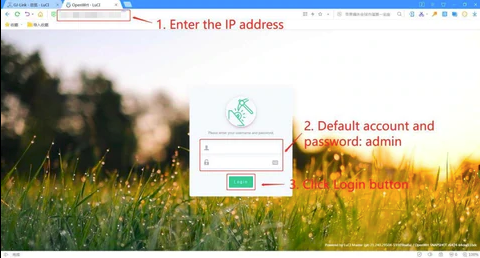
Enter the obtained IP address in the browser (Google Chrome is recommended) then enter the administrator account and password: admin in the server login page.
Network setting
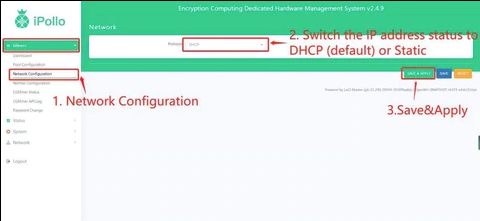
Click Miners-Network Configuration on the left side list, switch the server IP address to DHCP or Static. (Default IP address state is DHCP)
Pool Setting
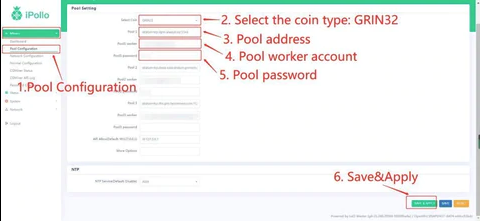
Click Miners-Pool Configuration on the left side list, select coin:Grin32
Available Pool for Grin32 (optional):
Pool1:stratum+tcp://asia-east-stratum.grinmint.com:3416
Pool2:stratum+tcp://us-east-stratum.grinmint.com:3416
Pool3:stratum+tcp://grin.always.vip:3344
Pool4:stratum+tcp://grin.us.always.vip:3344
*For Decentralization and healthy Network, choose other pools please.
Pool Worker:According to the“sub-accounts”set in the corresponding mining pool account, if the sub-account is ipollo123, the worker should be ipollo123.xxx, the number suffixed used to distinguish the server.
The default pool password is 123.
After finishing 3 pools setting, click Save&Apply.
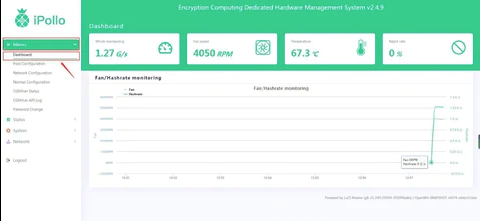
Check the operating status of server
Click Miners-Dashboard to check current server operating status.
Done!
**Instructed by ipollo official